Business License

POM Injection Molding Guide: Parameters, Defects, and Best Practices
POM injection molding requires precise temperature control, thorough drying, and mold design that accounts for high shrinkage and fast crystallization. When these factors are managed correctly, POM delivers dimensionally stable, low-friction parts ideal for gears, bearings, and precision mechanical components.
In March 2025, a Suzhou injection molder named Li Wei received a 50,000-piece order for POM gears. He treated the material like ABS and skipped pre-drying. The first production run produced parts with silver streaks, voids, and dimensions outside tolerance. Scrap reached 18%.
After Li Wei dried the resin at 80 °C for four hours, raised the melt temperature into the recommended 190-210 °C range, and increased pack pressure, the scrap rate fell below 3%. The shipment left on time.
If you are moving POM into production, this POM injection molding guide will help you avoid the mistakes that cause defects and rework. You will learn how to prepare the material, set machine parameters, design tooling, and troubleshoot common problems for both homopolymer and copolymer grades.
Key Takeaways
POM must be dried to below 0.05% moisture before molding to avoid hydrolysis and surface defects.
Typical POM melt temperature is 180-210 °C for copolymer and 190-215 °C for homopolymer; overheating causes formaldehyde degradation.
Mold shrinkage ranges from 1.8% to 2.5%, so draft angles, gate placement, and cooling must be designed accordingly.
Common defects such as voids, sink marks, burn marks, and warpage usually trace back to moisture, temperature, or packing pressure.
Ailide Polymer supplies certified POM grades with technical data sheets and application support for molders.
Why POM Needs Specialized Injection Molding
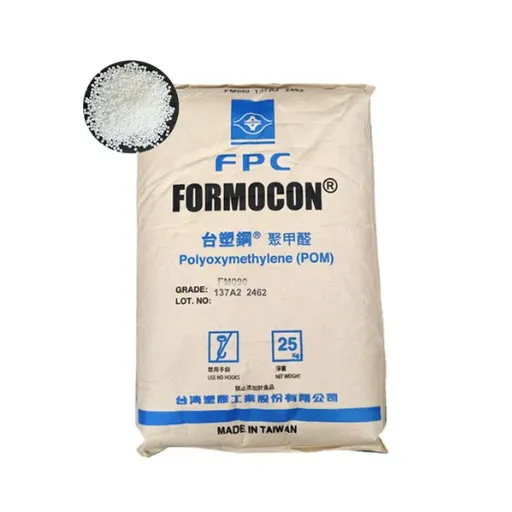
POM, also called polyoxymethylene or acetal, is a high-crystallinity engineering thermoplastic. It melts and solidifies quickly, shrinks more than ABS or polycarbonate, and is sensitive to moisture and heat. These characteristics make POM injection molding — and acetal injection molding more broadly — different from processing commodity plastics.
Molders who approach POM like PP or ABS often struggle with part tolerances, surface quality, and degradation. A dedicated POM injection molding guide helps you set realistic process windows and avoid the trial-and-error that drives up scrap and lead time.
For a broader material overview, see our article on POM polyoxymethylene mechanical properties or browse the POM grades we supply.
POM Material Preparation and Drying
Moisture is the single biggest cause of poor POM molding. POM hydrolyzes at molding temperatures, producing formaldehyde gas and reducing molecular weight. The result is surface streaks, brittleness, and inconsistent dimensions.
Moisture Limits
POM resin should be dried to below 0.05% moisture before molding. Virgin resin left open in a humid shop can reach 0.2-0.3% moisture in a few hours. Regrind should also be dried because it has a higher surface area and absorbs moisture faster.
Drying Equipment and Time
A dehumidifying desiccant dryer is recommended. Set the drying temperature to 75-85 °C and dry for three to four hours. Do not exceed 90 °C for long periods because surface oxidation can begin. Keep the resin sealed after drying and use it within two hours if possible.
A Ningbo automotive supplier we worked with stored POM in an unsealed gaylord during a humid July week. Parts developed a frosted surface and lost impact strength. Moving to sealed containers with desiccant eliminated the issue without any machine changes.
POM Injection Molding Machine Setup
The injection molding machine must deliver consistent melt temperature, controlled injection speed, and adequate pack pressure. POM injection molding parameters vary slightly between homopolymer and copolymer grades, but the overall window is narrow.
Barrel Temperature Profile
Typical POM molding temperature settings for the barrel are:
Rear zone: 160-180 °C
Middle zone: 170-190 °C
Front zone: 180-200 °C
Nozzle: 180-200 °C
Homopolymer grades such as DuPont Delrin can tolerate slightly higher temperatures than copolymer grades. Copolymer POM from suppliers such as Polyplastics usually processes best at the lower end of the range. Overheating above 230 °C causes thermal degradation and formaldehyde release.
Monitor melt temperature with a pyrometer rather than relying only on barrel settings. Residence time should be kept short. POM should not sit in the barrel for more than five to ten minutes at processing temperature.
Screw and Nozzle Design
Use a general-purpose screw with a compression ratio of 2.0:1 to 2.5:1 and an L/D ratio of at least 18:1. A check ring that seals well is important because POM has low melt viscosity and can drool.
Choose an open nozzle with a short land length. Shut-off nozzles can trap degraded material and cause dark streaks. The nozzle orifice should match the sprue bushing closely to prevent cold slugs.
Injection Pressure and Speed
Injection pressure typically ranges from 70 to 120 MPa, depending on part geometry and wall thickness. Thin-wall parts need higher injection speed and pressure. Thicker sections require slower fill to avoid jetting and gas traps.
Pack and hold pressure is usually 50-80% of injection pressure. Adequate packing reduces sink marks and voids. Hold time should be long enough for the gate to freeze, typically three to ten seconds depending on wall thickness.
Mold Design for POM
POM parts require tooling designed around high shrinkage, fast crystallization, and low friction. Draft angles, cooling, and venting are especially important.
Shrinkage and Draft
POM shrinkage is typically 1.8-2.5% for unfilled grades. Glass-filled grades shrink less, around 0.5-1.0%, but they are more abrasive. Draft angles of 0.5-1 degree per side are usually sufficient for shallow parts. Deep cores and ribs may need 1-2 degrees to allow easy ejection.
Uniform wall thickness reduces warpage. Avoid thick sections because POM crystallizes quickly and can form voids or sinks in the center of heavy walls.
Gate and Runner Design
Edge gates, submarine gates, and tab gates all work with POM. Gate thickness should be 50-70% of part wall thickness to allow proper packing. Pin gates are not recommended because the high shear can overheat the material.
Runners should be full-round and sized to deliver melt without excessive pressure drop. Cold slug wells at the end of runners help trap the cooler front of each shot.
Venting and Cooling
POM releases gas quickly as it fills. Deep ribs, bosses, and thin sections need vents 0.01-0.03 mm deep to prevent burn marks. Vents should be placed at last-fill areas.
Cooling must be uniform and efficient. POM parts can be ejected at higher temperatures than many plastics, but uneven cooling causes warpage. Aim for a mold temperature of 60-90 °C for standard grades and up to 120 °C for some high-gloss or tight-tolerance applications.
POM Homopolymer vs Copolymer Molding Differences
Homopolymer and copolymer POM process similarly, but there are differences to keep in mind when choosing a grade and setting parameters.
| Parameter | POM Homopolymer | POM Copolymer |
|---|---|---|
| Melt temperature | 190-215 °C | 180-210 °C |
| Mold temperature | 60-95 °C | 60-90 °C |
| Shrinkage | 1.9-2.5% | 1.8-2.3% |
| Thermal stability | Slightly lower | Better |
| Chemical resistance | Good | Better |
| Typical suppliers | DuPont Delrin | Polyplastics, Mitsubishi |
Homopolymer POM offers higher stiffness and fatigue resistance but is less forgiving at high temperatures. Copolymer POM has a wider processing window and better hydrolysis resistance. For hot-water or fuel-contact parts, copolymer is usually the safer choice.
Our POM material selection guide explains how to match grade type to application requirements.
Common POM Injection Molding Defects and Fixes
Most POM molding problems fall into three categories: moisture, temperature, or packing. The table below summarizes the most common defects, their likely causes, and practical fixes.
| Defect | Likely Cause | Fix |
|---|---|---|
| Voids / sink marks | Thick sections, insufficient packing | Increase pack/hold pressure, extend hold time, reduce wall thickness |
| Silver streaks | Moisture or volatile degradation | Dry resin below 0.05%, lower melt temperature, clean barrel |
| Burn marks | Trapped air or degraded resin | Improve venting, reduce injection speed, check residence time |
| Warpage | Uneven cooling or asymmetric design | Balance cooling, maintain uniform wall thickness, anneal parts |
| Dimensional variation | Inconsistent shrinkage or melt temp | Stabilize melt temperature, adjust mold temperature, condition parts |
Voids and Sink Marks
Voids are empty spaces inside thick sections. Sink marks are depressions on the surface. Both occur when the core of a thick section shrinks after the gate freezes.
Fixes include increasing pack and hold pressure, extending hold time, reducing wall thickness, adding ribs instead of thick sections, and raising mold temperature slightly to improve flow.
Burn Marks and Silver Streaks
Burn marks are caused by compressed air or degraded resin. Silver streaks usually signal moisture or volatile degradation.
Check drying first. Verify that the resin moisture content is below 0.05%. Improve venting, reduce injection speed, and lower melt temperature if degradation is suspected. Clean the barrel if dark streaks appear.
Warpage and Dimensional Issues
Warpage results from uneven cooling, asymmetric part design, or excessive orientation. Dimensional variation often traces back to inconsistent melt temperature or uneven shrinkage.
Balance mold cooling channels, maintain consistent cycle time, use uniform wall thickness, and consider mold temperature adjustments. Annealing parts at 80-130 °C for one to two hours can relieve internal stresses.
Post-Molding Handling and Annealing
POM parts can be ejected warm, but handling them while hot may cause distortion. Allow parts to cool on a flat surface or in fixtures before inspection and packing.
Annealing is useful for tight-tolerance parts or parts with high internal stress. Heat parts at 80-130 °C for one to three hours, then cool slowly. Annealing stabilizes dimensions and reduces stress cracking.
Avoid machining POM immediately after molding. Let parts condition for 24-48 hours at room temperature so moisture and stress equilibrate.
POM Injection Molding Safety Considerations
POM degrades to formaldehyde when overheated. Formaldehyde is irritating to the eyes and respiratory system. Keep melt temperature below 230 °C and minimize residence time.
Ensure the molding area is well ventilated. Follow local occupational exposure limits for formaldehyde. If the barrel has been overheated, purge thoroughly with a compatible material before restarting production.
Store POM resin in sealed containers away from moisture and heat. Label regrind clearly and keep it covered when not in use.
POM Injection Molding Guide FAQ
What is the ideal POM molding temperature?
The ideal POM melt temperature is 180-210 °C for copolymer grades and 190-215 °C for homopolymer grades. Mold temperature is typically 60-90 °C. Staying within this range prevents degradation while allowing good flow.
How much does POM shrink during injection molding?
Unfilled POM shrinks 1.8-2.5% depending on grade, part thickness, and processing conditions. Glass-filled grades shrink less. Shrinkage is higher in the flow direction than across flow.
Do you need to dry POM before molding?
Yes. POM must be dried to below 0.05% moisture. Dry at 75-85 °C for three to four hours in a desiccant dryer. Skipping drying causes silver streaks, brittleness, and degradation.
Can POM homopolymer and copolymer use the same molding settings?
They are similar but not identical. Homopolymer processes at slightly higher melt temperatures and is less thermally stable. Copolymer has a wider processing window and better chemical resistance.
What causes formaldehyde smell during POM molding?
Formaldehyde smell indicates thermal degradation. Reduce melt temperature, shorten residence time, improve venting, and purge the barrel if degraded material is present.
Conclusion
This POM injection molding guide covers the essential steps for molding POM reliably. Drying, temperature control, mold design, and packing pressure are the four levers that determine part quality. Small adjustments in each area can reduce scrap, improve dimensions, and protect tooling.
Whether you are molding gears, bearings, housings, or automotive components, choosing the right POM grade is the first step. Ailide Polymer distributes certified POM homopolymer and copolymer grades from authorized global suppliers. We provide POM material data sheets, batch traceability under a strict quality assurance framework, and technical support for material selection and processing questions.
Contact our team to discuss your project, request a quote for certified POM grades, or arrange a trial batch for mold validation.
Recently Posted
-
ABS in Automotive Interiors: From Dashboards to Door Panels
September 2, 2026A tier-two supplier once substituted a general-purpose ABS for an automotive-grade ABS on a door trim component to save 4% on resi Read More
 -
ABS Flame Retardant Grades and UL 94 Ratings Explained: A Practical Guide for Buyers and Designers
September 2, 2026An electronics manufacturer once submitted a power-supply housing molded from standard ABS to a safety certification test. The mat Read More
 -
KOCETAL K300 vs Formosa FM090 vs DURACON M90: Picking the Right Medium-Viscosity POM
September 2, 2026A gear shop in India once ordered a container of acetal copolymer based on a 5% price discount, without checking whether the grade Read More
 -
PP vs PE: Which Polyolefin Resin Fits Your Application?
September 2, 2026A bottle manufacturer once chose HDPE for a hot-fill juice container and watched the bottles distort on the filling line. The mate Read More

Contact Us
Recommended Products
-
 Automotive Interior Clip and Door Lock POM K300 Injection Molding Material With Low FrictionNegotiableMOQ: 1 Kilogram
 -
KOCETAL POM K300 Virgin Pellets For Precision Gear Bearing Automotive Latch Water Valve PartsNegotiableMOQ: 1 Kilogram
-
Original Kolon POM K300 Engineering Plastic Wear Resistant Self Lubricating Acetal GranulesNegotiableMOQ: 1 Kilogram
-
Self-Lubricating POM K300 HDT 120°C Wear Resistant Resin With 0.2% Moisture AbsorptionNegotiableMOQ: 1 Kilogram
-
POM FM090AW PTFE Filled Wear Resistant Low Friction Acetal for Silent GearsNegotiableMOQ: 1 Kilogram
-
POM FM090 General Purpose Acetal Copolymer With Excellent MachinabilityNegotiableMOQ: 1 Kilogram
-
POM FM090 Standard Flow Acetal Copolymer Granules for Precision Injection MoldingNegotiableMOQ: 1 Kilogram
-
POM FM090 UV Stabilized Acetal Resin for Outdoor Automotive ComponentsNegotiableMOQ: 1 Kilogram
-
Technical Support Available POM K300 Acetal Copolymer for Precision Injection Molding ServiceNegotiableMOQ: 1 Kilogram
-
KOCETAL POM K300 Acetal Copolymer MFR 9 G/10min 1.41g/cm³ Tensile Strength 60MPaNegotiableMOQ: 1 Kilogram
-
Factory Price Polyacetal POM Resin FM090 for Engineering ApplicationsNegotiableMOQ: 1 Kilogram
-
High Strength Cheap POM FM090 UV Engineering Plastic for Automotive PartsNegotiableMOQ: 1 Kilogram
-
Virgin POM FM090 Granules Pellets Engineering Plastic Raw MaterialNegotiableMOQ: 1 Kilogram
-
POM K300 Plastic Granules 1.5% Shrinkage Rate 80 Shore D Hardness Stable Injection Molding PerformanceNegotiableMOQ: 1 Kilogram
-
Low Friction Coefficient High Dimensional Stability POM K300 Acetal Copolymer Injection Molding GradeNegotiableMOQ: 1 Kilogram

-
POM K300 Acetal Sheet Used for Automotive Gear Components and Conveyor Chains in Industrial MachineryNegotiableMOQ: 1 Kilogram
-
POM K300 Engineering Plastic Sheet With Melting Point 165°C and Excellent Wear Resistance for MachiningNegotiableMOQ: 1 Kilogram
-
POM K300 Acetal Copolymer Injection Molding Grade With Low Friction Coefficient and High Dimensional StabilityNegotiableMOQ: 1 Kilogram
-
POM K300 Polyoxymethylene Resin MFI 9 Engineering Plastic Granule for Injection MoldingNegotiableMOQ: 1 Kilogram
-
Virgin POM Granules Polyoxymethylene Pellets Manufacturer Direct Price for Injection MoldingNegotiableMOQ: 1 Kilogram